
This page contains affiliate links to Amazon.com and other reputable websites. We may earn a (very) small commission when you purchase through these links. There is no added cost for you, so thank you for your support.
Thank you for purchasing my Labradoodle book, The Owner’s Guide To The Perfect Labradoodle! I’m not sure where you are in your journey, but you’re in a good place. I love the breed so much that I recently added a second pup to the family.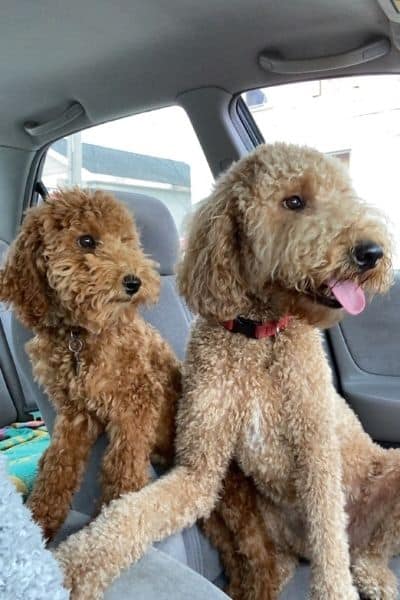
Grooming & Bathing
This is probably one of the most important and often overlooked aspects of owning a Labradoodle – their coats need love. I can’t tell you the number of times I’ve met a doodle at a dog park or on a walk… reach out to pet them, and…
Tip: Start getting your puppy used to all of this early on. You will thank me later, I promise!
Brushing/Combing
I’ve gone through many brushes and combs over the years. I probably have 2-3 different ones of each right now, actually. Not this might seem like overkill, but here’s what I recommend you get, when you’ll need it, and why it rocks.- Wire-Pin Brush: A brush like this by Coastal is great for getting your puppy used to the brushing process. It’s gentle and works well for getting little tangles out. As they get older and their coat changes, it won’t be your go-to.
- Steel Poodle Comb: These are sometimes called finishing combs or butter combs as well. For me, a comb is the best tool for ensuring you doodle doesn’t get mats. It allows you to get down to the skin where mats often start. They also work great in the more delicate areas and around the face. You can find my favorite one on Amazon.
- Slicker Brush: Once you’ve gone through their coat with the comb, the finishing touch comes from the slicker brush (this is a good, relatively inexpensive option). Like its name implies, this brush will smoother their coat and bring out the shine. Be careful – the wire bristles can hurt your pup is used wrong and this brush doesn’t get small mats out.
- Dematting Comb: If you find yourself using this tool often, it means you’re not using the comb enough. It’s inevitable – you’ll find a mat or two on your pup. The bad ones are painful to comb out, so you’ll want to use a dematting comb like this one, to cut (yes cut) the mat free.
Tip: Sadly, your pupy will lose their super soft puppy coat. It happens over time; usually starting around 6-month of age. During this time is when the potential for matting is greatest and when brushing regularly to avoid mats is crucial.
Bathing
I can always tell when it’s time for my pups to get a bath. The season and degree to which your dog loves the outdoors (they all tend to love it…just some more than others) will dictate how often they need a bath. As with brushing, I highly recommend you get them used to the bath as soon as possible. This is especially important if you want them comfortable around water (lakes, pools, rivers). I’m going to break down the process I go through when bathing my boys. 1. Get everything ready. I start by getting their shampoo, conditioner, and towels (you’ll want a few) ready. There’s nothing worse than getting them in the tub/shower, only to realize you forgot. I’ve used this shampoo since Oliver was a pup and love it. It’s soap and alcohol-free and available on Amazon for cheaper than most stores. The conditioner I use (called Cowboy Magic, sweet name, ha) can be applied wet or dry. I save that for the very end after they’re towel-dried, but still a bit wet. 2. Prep their ears. Floppy-eared breeds like the Labradoodle need their ear canals kept dry. If they aren’t, the moisture will be trapped and can quickly turn to infection. How do you keep the water out? Little cotton makeup rounds like these work amazingly well. For puppies, you can cut them in half and fold them into a little triangle. Then press them (gentle) into their ear canal. As they get older, you can fold them in half, then in half again…and press them in the canal. Obviously, be extremely careful when doing so. And make sure they don’t shake their head until AFTER the bath or they’ll come flying out. 3. Soak them down and wash them up. This part is pretty straight forward. But here are a few tips to help you along.- Labradoodle coats tend to dry quickly. So working on one area of the body at a time is best.
- Make sure you get all of the shampoo out during the rinsing process.
- If you don’t have one already, a handheld showerhead (like this bad boy) will make this entire process 1000X easier and help get all the suds out.
Grooming
I talked a little bit in my book about my experience with groomers but thought I should talk about it again. Grooming, whether you take them to get clipped by a professional or take it on yourself, will be a big part of your pup’s life. And you know the drill by now – get them used to it early on. You’re welcome…again. Going to a groomer. If you’re a first-time Labradoodle owner, I recommend finding a qualified groomer well in advance. Heck, you could start finding one before you even bring your pup home. You want to find a groomer that has experience doing a Labradoodle cut, not just doing “Poodle cuts”. That was my first mistake. Make sure you ask for pictures of Labradoodle cuts they’ve done in the past. And come with pictures of your own. A quick search on Pinterest for Labradoodle Haircuts is a great place to find inspiration. I recommend taking them in around 12-14 weeks for a puppy cut. They sometimes call this a teddy bear cut. This is mainly just a clean-up – Not much will be taken off here. Around the eyes, trimming the ears, cleaning up the beard, butt, and belly. They should be good to go.Tip: I’ve always brought my own shampoo and conditioner to the groomer for them to use. I’m not sure if all are open to that but it’s worth asking about.How often do you have to get them groomed? This all depends on how short you like them. As a puppy, we thought it would be cute to keep Oliver’s hair longer. Looking back now, he didn’t pull the look off well (ha!). I now keep him at about 3/4″ year-round (and we live in the cold Midwest). He’s 2 years old now and I probably clip his entire body every 6 weeks. Grooming adds up. The cost of grooming varies depending on where you live and what you’re having done. A puppy cut might only run you $35-40, while a full-service wash and groom can cost $75+, not including tip. If you’re anything like me, it might make sense to get some of your own grooming tools (shears and clippers). Even if you’re not brave enough to do the entire job, it’s still nice to be able to do little clean-ups between grooming sessions. Especially around the eyes. Getting your own grooming tools. If you just want to dip your toe in the water with grooming your doodle, I’d recommend starting with a basic shear kit like this one. They even have safety tips to keep you from poking your dog. Once I did the math, I decided that getting a professional clipper set made sense. The entire setup paid for itself in just 3 groomings. Here’s exactly what I use:
- Clippers: Andis ProClip AGC Super 2-Speed Plus Detachable Blade Clipper (see on Amazon)
- #30 Blade: This is optional since the Andis ProClip comes with a blade, but I think it cuts better. (see on Amazon)
- Guards: Universal Clipper Guards (see on Amazon)
- Cleaner/Lube: Andis Cool Care Plus Clipper Lube (see on Amazon)